|
FAQs | Feedback |
The process for creating an Export is outlined below:
Step |
Action |
1 |
Navigation: Configuration > Data Exchange > Exports
New Button. |
2 |
Press NEW to create a new export.
Edit Export Form. |
3 |
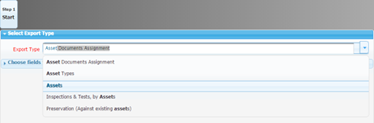
Select Export view.
Edit Export Form - Field Selection. |
4 |
Select EDIT LIST to load up the field assignment tool. Use the COLUMN NAME seeking box (top of list) to assist in filtering for fields desired. Left click to highlight the row(s) then press the RIGHT ARROW to assign and move them to the right side, which are the selected fields. Press DONE when field selection is complete. NOTE: To export all available fields you can select the DOUBLE RIGHT ARROW. This will move all available fields to the right column.
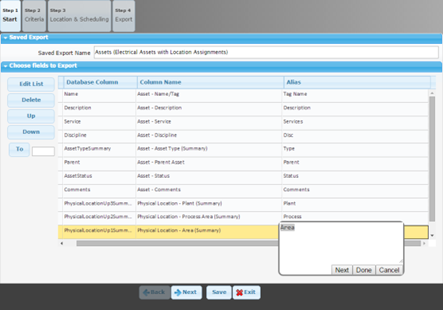
Edit Export Form - Field Ordering. |
5 |
Select the row(s) to order. A user can move a row up or down in order by selecting the field row and pressing UP or DOWN buttons. Enter in ALIAS to overwrite the “Column Name” which will be the default label for the column name in the exported XLS file. Press NEXT to enter in filter criteria.
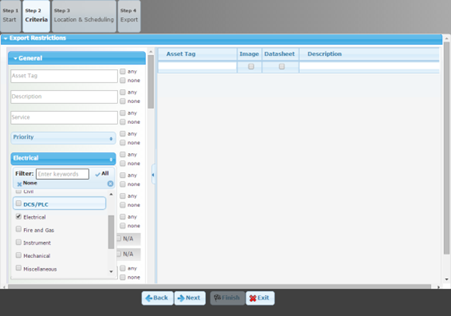
Edit Export Form - Enter Filtering. |
6 |
Enter in the filter criteria to restrict the content required for the export. If the user wants all data then do not enter in any filter criteria. NOTE:
Press NEXT to define the location of export and scheduled export frequency.
Edit Export Form - Location. |
7 |
Create Export and Location to complete the creation of the export record. Enter in the Saved Export Name and select Create if this export is meant to be saved for future access. If the export is only needed once, select NO for new export. NOTE:
Press FINISH to generate the on-demand Export.
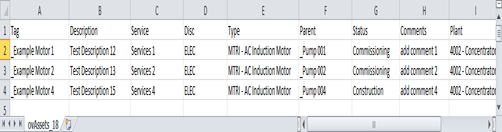
Exported Data - Formatting. |
8 |
Review Exported XLS file. At this point a user will need to perform final formatting such as putting on a FILTER on the first row (column headers) and using FREEZE PANE on the second row, so the column headers are anchored at the top. From there, a user can apply sorting and other filter and share accordingly.
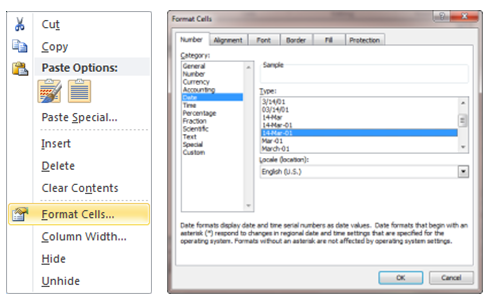
NOTE: Exports dump out date values in raw format, as each client and global region prefers a specific formatting of dates. Select the column and right click, select FORMAT CELLS, select DATE category, and select direct formatting type and then select OK.
Next Training: Export Log |
CONFIDENTIAL - Licensed Users Only
|