The User Applications module allows the System Administrator to define the various Roles that primarily controls the user’s record level access permissions in ALL the different modules/managers.
The step by step guide below goes through all the tabs of the User Application Editor:
Step |
Action |
1 |
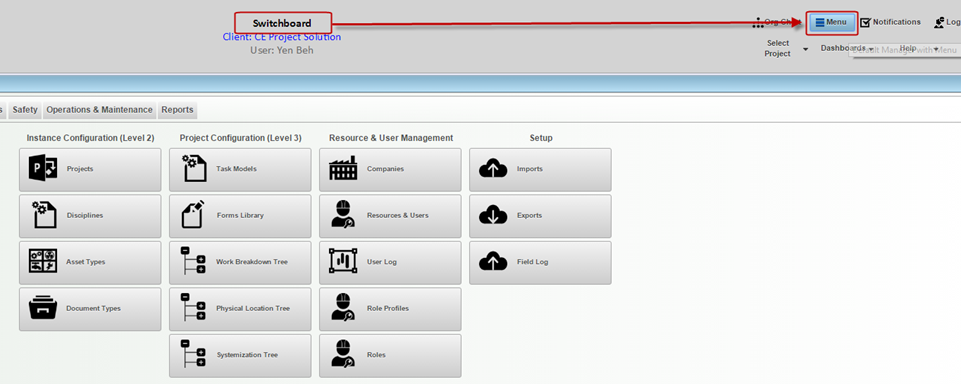
Select Menu From the Switchboard, navigate to the Menu option. Navigation: Switchboard > Menu
Configuration Menu. |
2 |
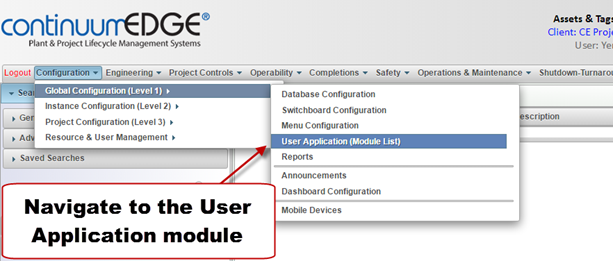
Select Config Menu User will be directed to a module to expose the menu bar (normally Assets & Tags Manager). Navigation: Configuration > Global Configuration (Level 1) > User Application (Module List) Note: The global configurations are typically not found in the switchboard as they are meant for the most advanced administrators.
Select Application. |
3 |
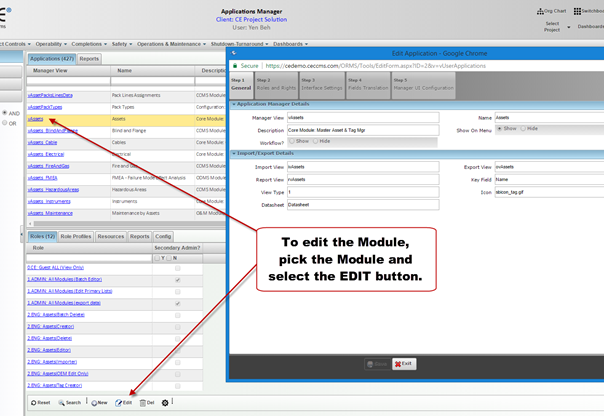
Select Application Select the SEARCH button to load the list of Modules. Select any of the module to view the various assigned Roles. System Administrator can type in the Module Name or Description field to search for a specific Module.
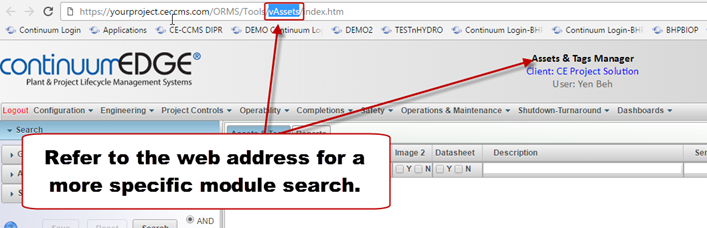
There are about 400+ modules/managers in CCMS and it is confusing when looking for a specific module. One easy way to accomplish this is by referring to the Module’s web address. All the modules will begin with the letter ‘v’ within the web address (e.g. https://www.yourproject-ccms.com/ORMS/Tools/vAssets/index.htm).
Select module hyperlink to load the module for configuration. Or Select row, and press EDIT button.
Hide/Show Applications & Workflow. |
4 |
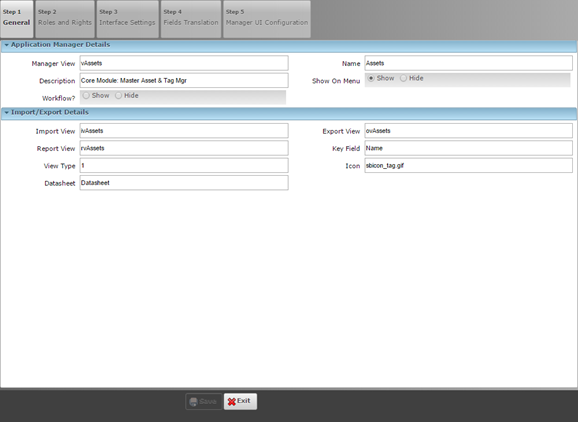
Hide/Show Application & Workflow The only item that an admin would change on this tab is HIDE/SHOW. Do NOT MODIFY anything else on this tab. The ‘Show On Menu’ booklean allows the System Administrator to hide or show the module in the dropdown menu. The ‘Workflow?’ boolean activates the workflow setup for the module i.e. the approval and completion process. This will be explained more in the Punchlist Manager example.
|
5 |
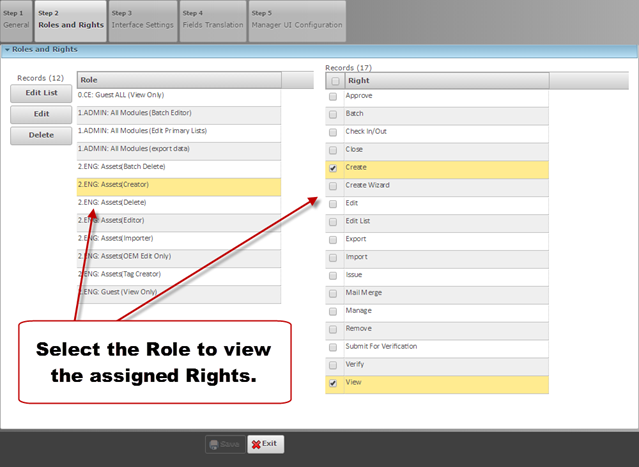
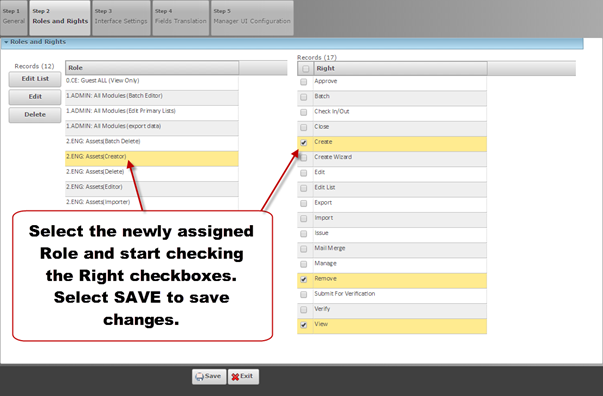
Configure Roles/Rights The Roles and Rights tab is where the System Administrator can define and assign more roles with rights against the Module. In this example, the ‘ENG: Assets(Creator)’ role have the Create and View rights within the ‘Assets and Tags Manager’, hence, any system users assigned with this Role can ONLY ‘create’ assets in this module. Note: Most of the modules already have these predefined roles setup. The System Administrator of the new projects can fine tune it to suit their organizational needs.
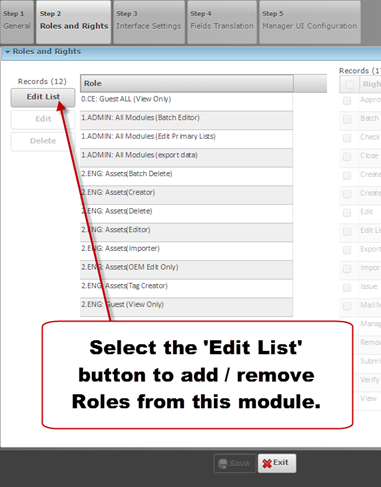
Tool Tip: To add a Role in this Module, select the EDIT LIST button to bring up the list of Roles.
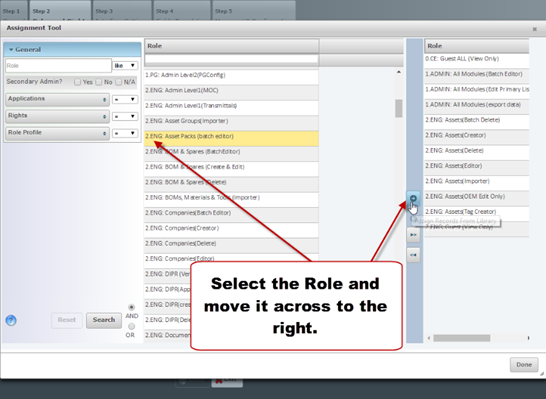
The ‘Assignment Tool’ will appear with filter/search functionality to view the list of Roles. Roles on left side (available to assign), and on right side (already assigned). System Administrator can just select the unassigned Role and select the Once done, select the DONE button to return to the ‘Application Editor’.
In the ‘Application Editor’, the assigned Role will appear in the Role list. Select the assigned Role to view the list of Rights. Select the rights for this role by checking the checkboxes. Select SAVE Note: Assigning which right to a role depends if the module has workflow and which states.
Next Training: Configure Module Interface Settings |
For internal use only |